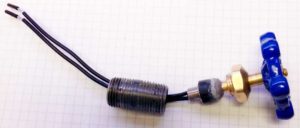
 Steampunk is about pipes, gauges, knobs and valves. The neat thing about incorporating a water faucet knob into a steampunk lamp design is that you can use it as the on/off switch. Being electrically inclined I figured there was some means to make this happen. Turning to the internet, I found a few places showing you how to convert a water faucet into a switch.
Some methods were easier than others. It comes down to what type of faucet you have available to start with and what type of tools you have access to. After reviewing all that is out there and walking up and down the aisles at the big box stores, I chose a method that required only a few tools and a good two-part epoxy.
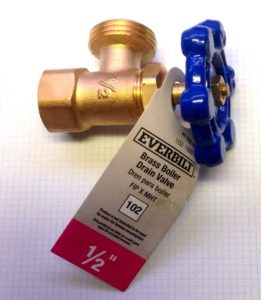
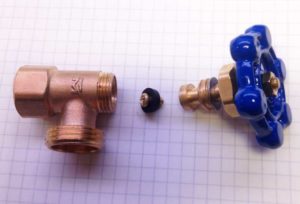
You want a faucet with a straight pass through. Meaning that the handle is in line with where the water comes into the back side. You also need a faucet that has a flat surface with a rubber washer as the seal. You don’t want the type with a gate valve or ball valve. I unscrewed a few at our local big box store just to see what was inside (you can borrow a wrench from the hardware department if need be, as I did). Lastly, your faucet needs to have a larger 1/2-inch cap just below the handle. That’s the part that unscrews from the faucet housing. This will allow it to screw onto your 1/2-inch black pipe. I settled on what was called a Brass Boiler Drain Valve. It seemed to have the features I needed and a dark blue spigot handle which could be aged easily. While there, grab a 1-1/2 inch by ½ inch black pipe nipple.
 Then I moseyed over to the electrical department and located a rotary switch. I had done my homework and saw that they had a switch that was suitable for embedding into the faucet. It needed to be small enough to fit inside a standard ½ inch iron pipe and have a plastic knob that I could modify if needed. These rotary switches are also available on Amazon, but I have not checked them out. Customer comments seem to indicate that they will fit the bill nicely. At the big box store, the switches were in the small plastic lamp parts bins hanging on a shelf at the end of one of the electrical aisles.
 At this same time, you will want to purchase a quality two-part epoxy like JB Weld. You don’t want a fast cure epoxy as they compromise the overall strength. You want one that takes several hours to completely cure.
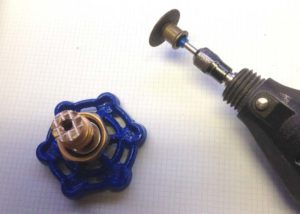
 What you may not have noticed (I didn’t at first) is that newer black iron pipe has a seam inside of it running the entire length. Be careful feeling it with your finger as it can be sharp. This seam could interfere with the rotary motion of the handle and switch so you need to sand it down so the inside is smooth. For this I used a grinding stone bit on the Dremel Tool. You only need to grind smooth about half of the length of the black iron pipe, the end where the wires will stick out
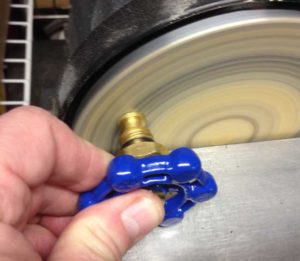
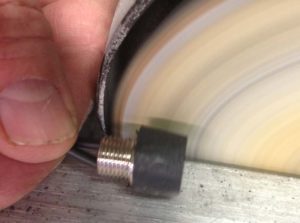 The plastic knob “hat” of the switch needs to slide inside the ½ inch pipe nipple without touching the sides. Mine was a little too fat. So, again I was over at my disc sander, sanding down the sides of the knob. Since the knob has a slight angle to it, you need to take more off at the base of the knob than you do at the top. With your ½ inch black pipe handy, test fit it several times until you have a good 1/16-inch clearance all around, maybe a little more.
 Now that you have all the parts ready to go, you’ll need to get out your two-part epoxy and a few Popsicle sticks. Mix up a small bit and using a new Popsicle stick start by placing a dab onto the metal face of the drain valve disc. Place your rotary switch knob against the epoxy and squeeze it so that most of the epoxy comes out. The Epoxy should be thick enough that it will hold it in place temporarily.
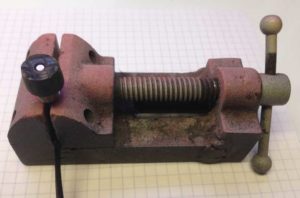
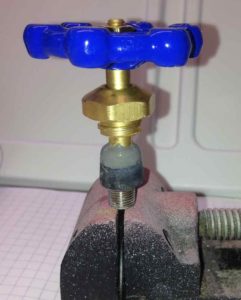 Using your Popsicle stick, spread the epoxy that was squeezed out the side, up and over the sides of the metal disc. I also added some additional epoxy to fully encapsulate the disc, top and bottom. Make sure you’ve centered the faucet by looking from all sides if you can. You’ll need to let the assembly sit overnight to dry. After its cured, if you have any drips down the side of the switch cap, be sure to gently file them down so they don’t contact the insides of the 1/2 inch pipe.
 You’ll need to cut out a cardboard washer to place on the back of the switch to keep the epoxy away from the rotating cap. You want the thinner type cardboard from a cereal box or some similar package. Trace the outside of one of the metal washers that came with the switch then draw a smaller circle on the inside about the size of the threaded end of the switch. I used the rubber washer taken off the faucet earlier as my small hole template. Now cut it out. I used an X-ACTO knife for the inner circle.
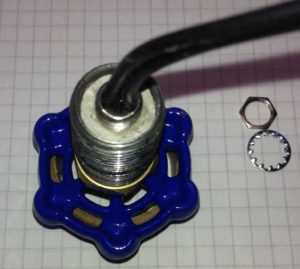 Place the assembly face down on an old roll of tape, so that it sits level. My switch came with two toothed washers and a nut. I slid on one of the washers and then put on my cardboard washer. Here you can see where the cardboard washer is needed to keep the epoxy that you are about to put on, away from the plastic switch. After the cardboard, I put on the second washer and then the nut. These parts give the epoxy something to grab on to besides the threads on the back of the switch.
 Mix up some epoxy and start dabbing it around the back of the switch, filling in the entire exposed end of black pipe. Keep it out of the hole where the wires enter the switch as I don’t know what’s down there that could get messed up if epoxy gets in there. If the epoxy seems too thin, let it sit an hour until it has thickened slightly before you proceed. It should self level. Be careful not to get any epoxy on the pipe threads, but you can always clean it off later.
That’s it. Once its cured overnight, you have your Steampunk Faucet Switch. Add it to your next Steampunk project
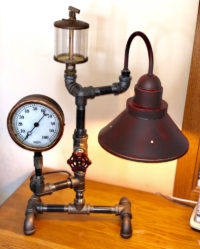
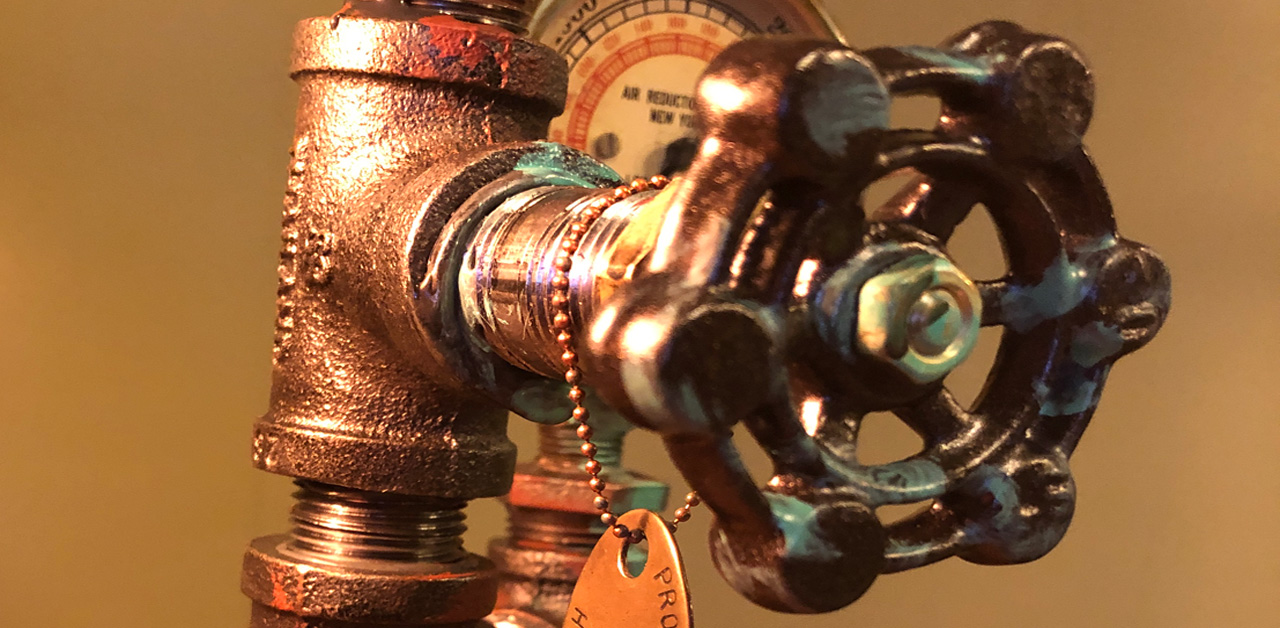
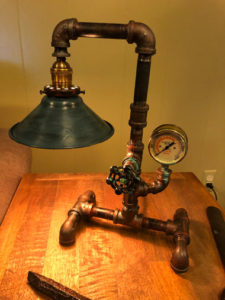
 Here’s a close up of the faucet switch installed on a Steampunk Table Lamp.. My wife “dry-brushed” some darker paint on it and then sanded some of it off. It gives it an aged look. It’s so cool to turn the handle and have the lamp light up. We gave the lamp to my daughter for Christmas and she put it in her newly refinished basement where she is going for a farmhouse look. It fit in great. So, be sure to check out my article on the Steampunk Table Lamp with a Farmhouse Look.


